Archive for ‘FolkArt Extreme Glitter’

May 1, 2012

Floral ZigZag Maracas

Since Cinco de Mayo is quickly approaching, we here at Plaid wanted to share with you another project you can create for this occasion. Shake up some fun using these Floral ZigZag Maracas. One of our fabulous designers, Kindra Boroff created these maracas. These were made using FolkArt paint, FolkArt Extreme Glitter, and Mod Podge. This is an intermediate level craft that will take 2 hours to complete. Be the life of the party with these bright and festive maracas. Enjoy!

Plaid Supplies

FolkArt Acrylic Paint: 2553 Lime Green, 2578 New Leaf Green,  412 Magenta, 660 Pure Gold

FolkArt Extreme Glitter: 2836 Champagne

Mod Podge: CS11305 4oz Matte

Plaid tools: 1534 1 ¼” Spouncer,  1” Flat

Other Supplies

6” Paper mache eggs, Large dowel rods, Dried beans, Brown craft paper, Hot glue, Sandpaper, Scissors, Gloss Sealer

Instructions

1. Cut the dowel rods into 2- 11” pieces. Sand the edge of one side to create a smooth handle.

2. Cut a hole into the bottom of the paper mache eggs and fill with dried beans. Add hot glue to the un-sanded end of the dowel rod, insert into the egg, attaching to the inside top of the egg. Hot glue around the hole of the egg and the dowel rod.

3. Cut pieces of craft paper and Mod Podge to the egg and the handle to create a finished look.

4. Base-coat the maracas with New Leaf Green. With the masking tape create a zigzag pattern as shown.  Tape off thin stripes on the handles. Paint with Lime Green.

5. Remove tape and paint the flowers onto the maracas with Magenta. Add Pure Gold centers to the flowers. Add Champagne glitter to the centers.

6. Seal with gloss sealer.
Tags: cinco de mayo, cinco de mayo crafts, , , , maracas, , , , zigzag
April 6, 2012

The Winner of the 16 Color FolkArt Extreme Glitter Paint Set Giveaway is…

Hooray it’s Friday! This week on Paint Me Plaid we are giving away a 16 color FolkArt Extreme Glitter paint set. This set of 16 resealable paint pots (1/6 oz. each) features popular FolkArt Extreme Glitter colors that are perfect for small projects or beginning painters. Set includes a paint brush to help you get started.

Congrats

Michelle

(winners have been contacted by email)

Thanks to everyone that entered our giveaway this week. We will be having another shortly, so be sure to check back on Paint Me Plaid to be notified.

Tags: , folkart extreme glitter paint, ,
April 2, 2012

16 Color FolkArt Extreme Glitter Paint Set Giveaway

A new week means a new giveaway. This week on Paint Me Plaid, we would like to add some shine to your life, by awarding 1 lucky winner a 16 color FolkArt Extreme Glitter paint set. This set of 16 resealable paint pots (1/6 oz. each) features popular FolkArt Extreme Glitter colors that are perfect for small projects or beginning painters. Set includes a paint brush to help you get started. The winner will be selected and announced on Friday April 6th.

To enter this giveaway, all you have to do is leave a comment below telling us what you would use these paints to create? For extra entries (leave a separate comment for each):

Like and let us know you entered the giveaway

Follow us on

The contest will end Friday April 6th, 2012 at 12 noon EST.

April 2, 2012

Make It Monday: Vintage Glamour Makeup Brushes

It’s a new week, and that means it’s time to try a new craft project. I love craft projects that you can use. The other day I happened to notice how bland my makeup brushes were. I wondered what I could to do to jazz them up? Luckily I did not have to look to far for a unique idea. Kindra Boroff created these Vintage Glamour Makeup Brushes, that I absolutely adore. This is a perfect craft for all skill levels, that will take about an hour to create. You are sure to be the envy of your girlfriends, once they see these incredible makeup brushes.

Plaid Supplies

Mod Podge-CS11305 4oz Matte

FolkArt Acrylic Paint-938 Licorice

FolkArt Extreme Glitter- 2792 Back

Other Supplies

Makeup brushes

Cherry fabric

Red satin ribbon

Small clear rhinestones

Permanent fabric glue

Flat brush

Masking tape

Scissors

Instructions

  1. Measure 1” from the tip of the brush handle and tape off. Paint the tip of the handle with Licorice. When dry paint a few coats of Black glitter as shown.
  2. Cut the fabric to fit the remaining section of the handle. Mod Podge the fabric to the brush handle. Allow to dry.
  3. Cut the red ribbon the wrap around the handle where the painted section and the fabric meet. Glue with fabric glue. Attach a small rhinestone to the ribbon as shown with fabric glue.
March 30, 2012

Freelance Friday: Glittering Flower Hair Clips

Hooray! It’s Friday, and the weekend is here. Looking for something creative to craft? Try these glittering flower hair clips. Women of all ages love to adorn their hair from time to time with hair accessories. From headbands to hair bows, we all have decorated our heads with something. Here is another accessory option that you can make. This glittering flower clip is very trendy and perfect for spring. I stumbled across this creation, on Pigs in Pajamas. This hair clip was created using flowers from Michaels, mod podge, and glitter. I love this project, because it is so fun and can be decorated in various ways. You can perhaps spray paint the flower, or use glitter paint from FolkArt or Martha Stewart paint lines. The possibilities are endless. Click here to learn step by step, to see how this project was created.

Tags: , , hair clips, , plaid craft,
March 27, 2012

Tuesday Tutorial: Flowers and Pearls Headband

Spring has sprung! This sweet headband is the perfect way to celebrate. It looks so pretty with a dress for a special spring occasion, or slip it on to dress-up a pair of jeans or a t-shirt. Laura Bray designed the adorable headband. To see more creations Laura has made, check out her blog, . It’s a beginner level craft that can take between 30 minutes to an hour to complete.

Plaid Supplies

FolkArt Extreme Glitter-2766 Neon Pink, FolkArt Extreme Glitter-2768 Neon Yellow, FolkArt Paint-521 Lemon Yellow

Other Supplies

Plastic headband, Straw flower, Vintage faux pearls, Craft glue, Small square of white felt

Instructions

  1. Paint headband in FolkArt paint in Lemon Yellow. Once paint is dry, apply a coat of Extreme Glitter in Neon Yellow.
  2. Paint center of flower in FolkArt paint in Lemon Yellow. Once paint is dry, apply a coat of Extreme Glitter in Neon Yellow.
  3. Apply two coats of Extreme Glitter in Neon Pink to the flower petals. Make sure you allow the Extreme Glitter to dry between coats.
  4. Glue vintage or faux pearl beads around the center of the flower.
  5. Glue flower onto side of headband. To secure, apply glue to one side of felt square and glue to the back of the flower. Make sure headband is securely glued between the felt and the flower.

March 8, 2012

Teaching Thursdays: Painted Eggs

By: Candie Cooper – Visit Candie’s blog, Candie Cooper’s Journal


I don’t know about you, but this girl has SPRING FEVER! From spending time outdoors to crafting, I’ve got a bad case of it. There are bits of pastel colors showing up in all my craft projects including these pretty painted Easter eggs.


For one egg, you will need a light and dark color of Folk Art paint plus the same color of Extreme Glitter. For this egg, I’m using Folk Art Teal and Jamaican Sea with Aqua Extreme Glitter. You will also need a paper mache egg, hot glue, ribbon, scrapbook embellishments, paintbrush, and a spouncer (found in the stencil section of a craft store).

Base-coat the egg in the light color and leave to dry. Don’t forget my favorite hair dryer trick to dry paint super fast! Place a dot of the darker paint on a pallet (see fancy resealable bag in background). Dip the spouncer tip into the paint and blog some off on the side. It’s now ready to make polka dots on the egg.

Once the polka dots are dry, you can apply a coat of Extreme Glitter and leave to dry. A plastic water bottle cap is a perfect prop to set eggs on while they dry.

The scrapbook section of the craft store is a good place to find embellishments for the tops of eggs. You could also make your own with ribbon bows or stickers.

Hot glue a piece or ribbon or lace around the egg followed by the flower embellishment. Finally, a use for all those pretty tiny ribbon scraps, right?

Put all your eggs in one basket or hide them one by one!


March 5, 2012

Make It Monday: Shamrock Garden Stakes

It is less than two weeks until St. Patrick’s Day. Time is winding down to create some festive crafts. Luckily we here at Plaid, can give you some inspiration. These cute shamrock garden stakes bring new meaning to having a “green thumb”. Whip-up a batch to sprinkle through your garden for St. Patrick’s Day or tuck one into a pot of clover for a sweet gift. This creative St. Patrick’s Day craft was created by, Laura Bray. This is a beginner skill level craft, that will take anywhere from 30 minutes to 1 hour to complete. See all the supplies you will need for this project, along with the instructions.

Plaid Supplies

FolkArt Extreme Glitter-2796 Hologram, FolkArt Paint-429 Winter White, Mod Podge-Outdoor

Other Supplies

3” x 4” wood shamrock blocks, Wood dowels (3/16” in diameter), Green and white scrapbook papers, Flower-shaped acrylic crystals, craft/wood glue, Black & white gingham ribbon

Instructions

  1. My shamrock shapes came painted, but if you purchase unpainted shamrocks, apply FolkArt paint in a shade of green to your block.  Allow paint to dry.
  2. Apply two coats of Extreme Glitter in Hologram to the shamrocks.  Set aside to dry.
  3. Using FolkArt paint in Winter White,  paint wood dowels.  Set aside to dry.
  4. Cut shamrock shapes, measuring smaller than your wood shamrock blocks, from scrapbook paper and apply to painted shamrock blocks using Outdoor Mod Podge.  Be sure to coat over the paper to protect the paper from light moisture. While Mod Podge is still wet, embed an acrylic, flower-shaped crystal into the center of the shamrock.

TIP: An easy way to create shamrock shapes is to cut out three heart shapes and join them at the pointed end of the hearts.

  1. Glue a painted wood dowel onto the back of your shamrock.
  2. Tie a black & white gingham ribbon to the dowel, directly beneath the shamrock.

Please note, these are delicate and care should be taken to protect them from the elements. Outdoor Mod Podge is protecting them, but there are also ribbons and acrylic crystals that can be compromised by the weather.

March 1, 2012

Technique Thursday: How To Use FolkArt Extreme Glitter Paint – Basic Instructions

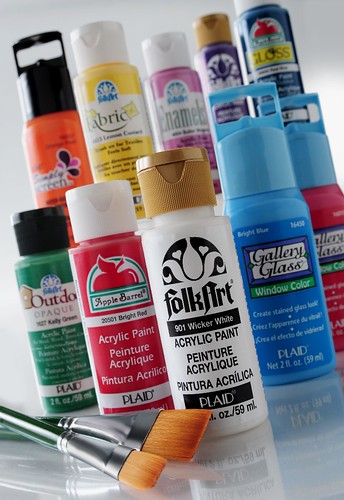
Have you ever used FolkArt Extreme Glitter Paint? In case you have not here is a little information about this amazing paint. Add an elegant, fine glitter finish to your next painting or home décor project with FolkArt® Extreme Glitter. This brush-on glitter paint lets you add eye-catching glitz and shimmer to terra cotta, wood, paper mache and other porous surfaces without the mess of traditional glitter and glue. Use these 3 simple steps to add FolkArt extreme glitter paint to your next project.

Step 1: Lightly sand project surface (if needed).

Step 2: Base coat with a FolkArt Acrylic Color.

Step 3: Apply 2-3 coats of FolkArt Extreme Glitter. Let dry between coats.

We love to see projects our readers have created. Please feel free to post craft projects to our fan page to share. Have any projects where you have used, FolkArt Extreme Glitter Paint? We’d love to see them.

Tags: , folkart extreme glitter paint, , , plaid paints, technique thursday
February 27, 2012

Make it Monday: Lucky Plaque

Happy Monday everyone. How was your weekend? Hopefully you had a good one. It’s a new week, and can you believe that the month of February is almost over? March will arrive this week, which means St. Patrick’s Day is right around the corner. Are you still looking for some craft projects to make to celebrate this holiday? Well we can help. Here is a great project to try, this Lucky Plaque. This project was designed by, Laura Bray. It is a beginner level craft project, that will take up to an hour to complete. See below the supplies you will need, and instructions on how to create this plaque. Enjoy!

Plaid Supplies

FolkArt Extreme Glitter-2796 Hologram, FolkArt Extreme Glitter-2857 Royal Blue, FolkArt Paint-429 Winter White, FolkArt Paint-526 Soft Apple, FolkArt Paint-484 Brilliant Ultramarine

Other Supplies

Wood plaque (5” X 20”), Wood shamrock (4” x 4”), Wood letters spelling out “LUCKY” (4” tall), Craft glue, Green and white polka dot ribbon

Instructions

  1. Paint wood letters in FolkArt-Brilliant Ultramarine.  Allow paint to dry.
  2. Once paint is dry, apply two coats of Extreme Glitter-Royal Blue to the letters.  Allow to dry between coats.
  3. Using FolkArt paint in Winter White and Soft Apple,  paint the wood plaque.
  4. Once paint is dry, apply two coats of Extreme Glitter-Hologram to the plaque.
  5. Paint the shamrock shape.  Paint stripes on the shamrock using FolkArt Brilliant Ultramarine, Soft Apple, and Winter White.  Allow to dry, then apply two coats of Extreme Glitter-Hologram over the shamrock.
  6. Glue letters onto plaque, spelling out the word, “Lucky”.  Make sure you leave room to attach the shamrock later.
  7. Glue shamrock to the top right corner of the plaque.
  8. Attach green & white ribbon to the plaque.  Tie bows where attached.  Hang and enjoy your unique St. Patrick’s Day décor!